Single Sign-on (SAML 2.0)
SSO integration is considered using the example of OKTA.
1. Register with OKTA and log in to your account. Go to the admin panel by clicking on Admin button.
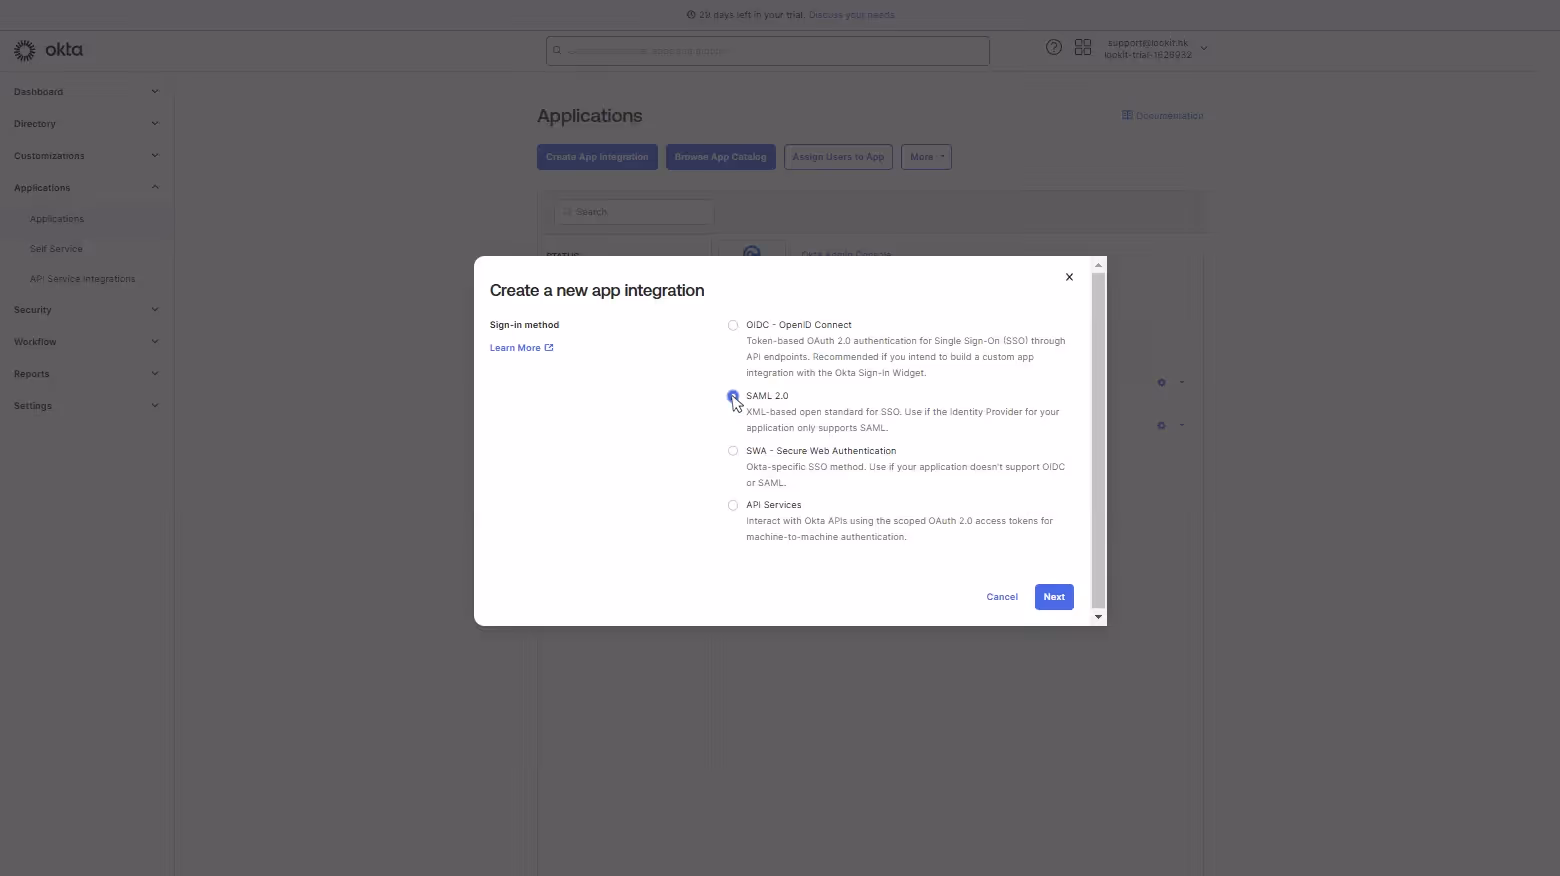
2. Select the Applications and Applications submenu on the left sidebar. Click the Create App Integration button. In the window that opens, select SAML 2.0 and click Next.
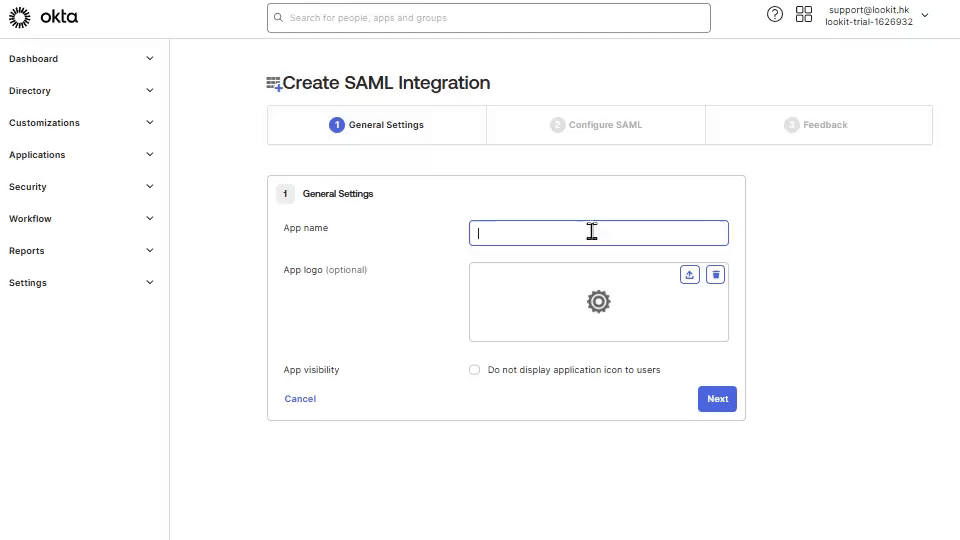
3. In Create SAML integration window, fill in the first step General settings. At this step, you need to write App name Look and upload App logo (optional), and click Next.
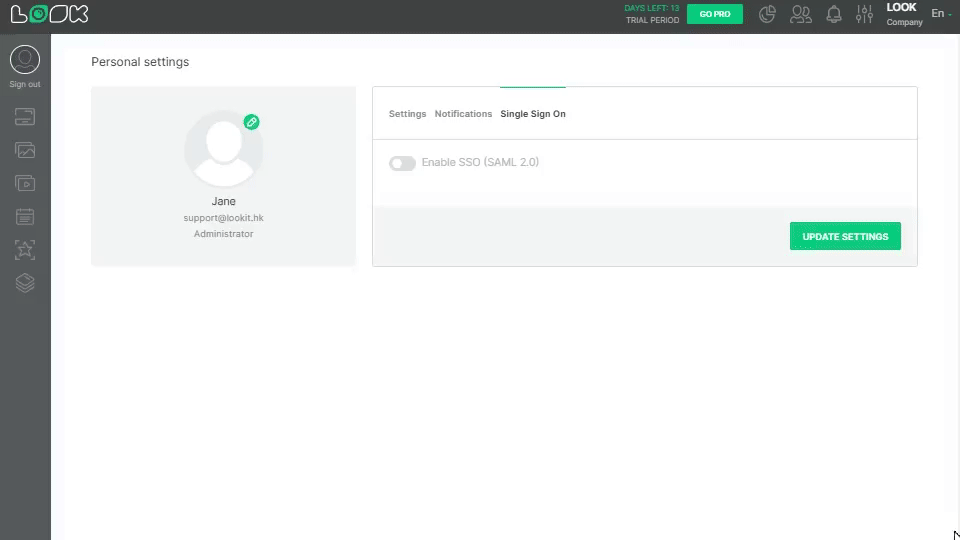
4. In the second step Configure SAML, open Personal settings in your Look account, click on Single Sign On tab, and activate Enable SSO (SAML 2.0) trigger.
Copy SSO URL (Assertion Consumer Service) link, go back to OKTA, and paste it to Single sign-on URL field.
From Look account copy Audience URI (SP Entity ID) link, and in OKTA paste it to Audience URL field. Select Email Address in the NAME ID format list and click Next.
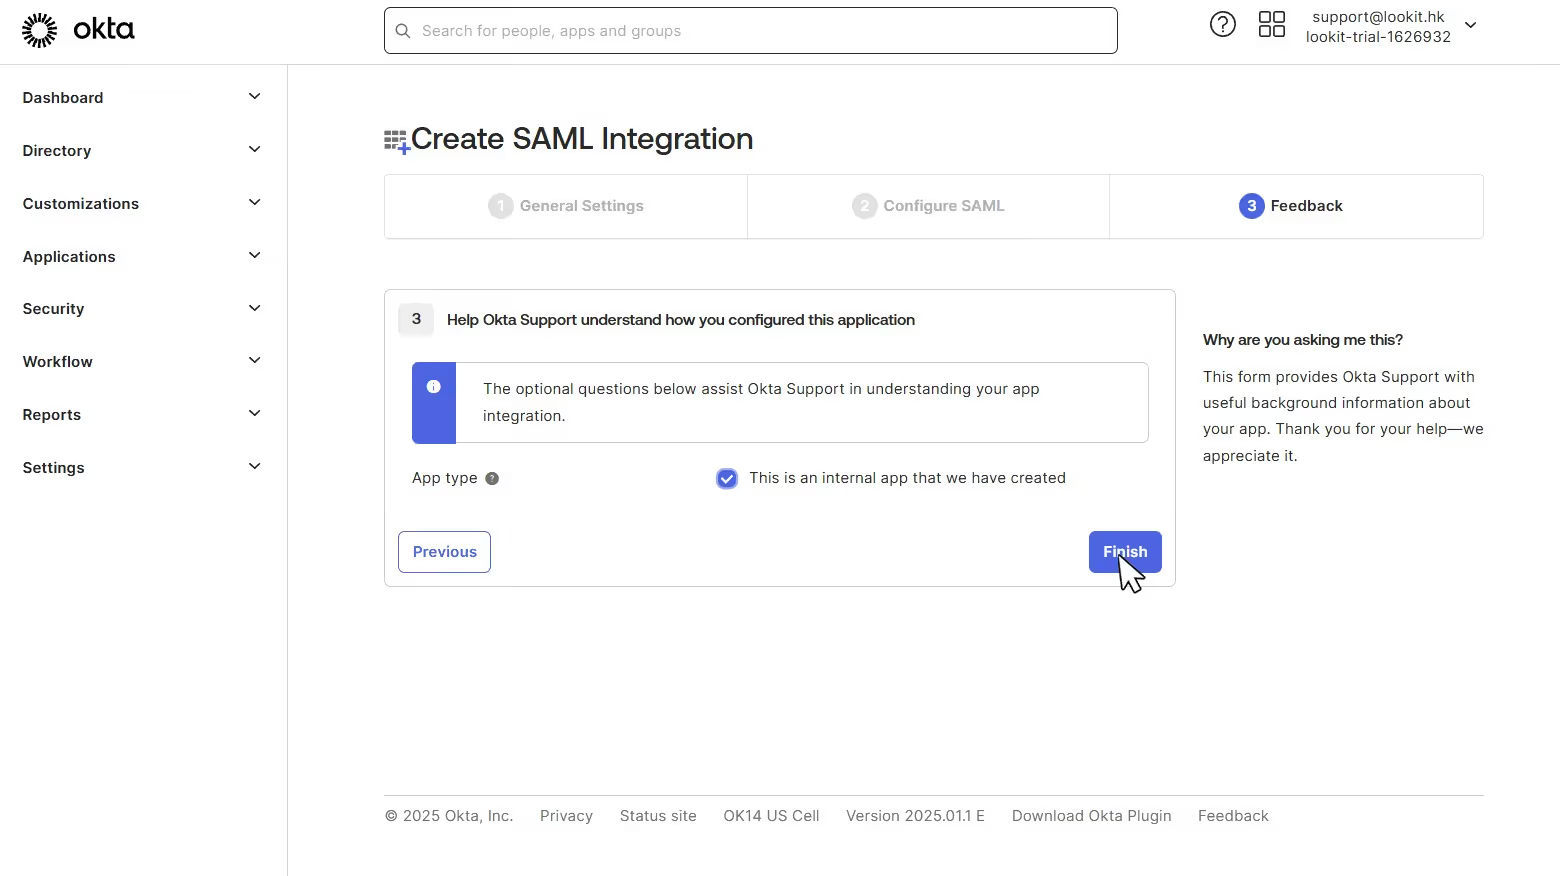
5. In the third step Feedback, in the App type select This is an internal app that we have created and click Finish.
6. In Settings that opens, click More Details.
Copy Sign on URL, go back to Look account, and paste it into Identity provider Sign-on URL field in Personal settings.
In OKTA copy the Issuer, and in Look paste it into Identity provider issuer (IP Entity ID) field.
Copy Signing certificate, and in Look paste it into Identity provider public certificate field.
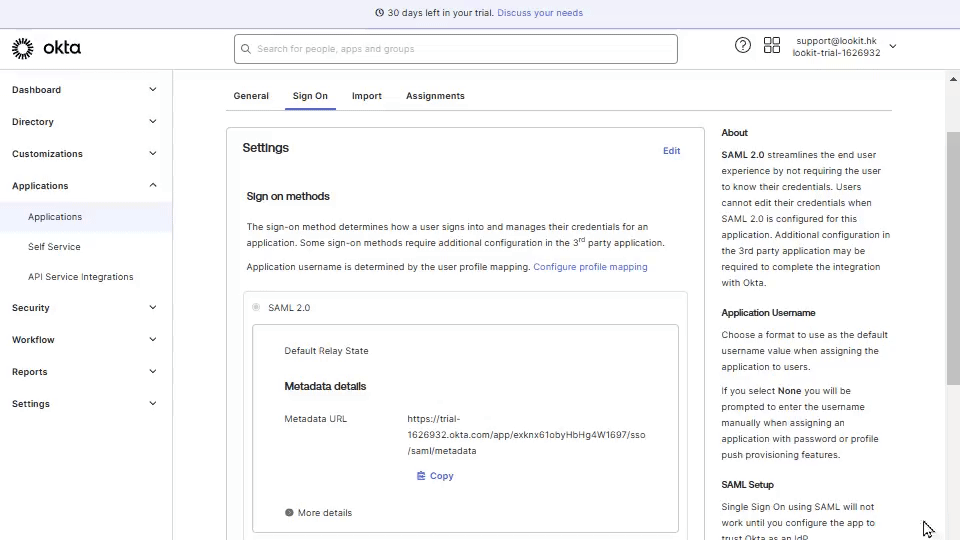
Also, you can download the certificate, open it with text readers, copy the text, and paste it to the Identity provider public certificate field in the Look personal settings tab.
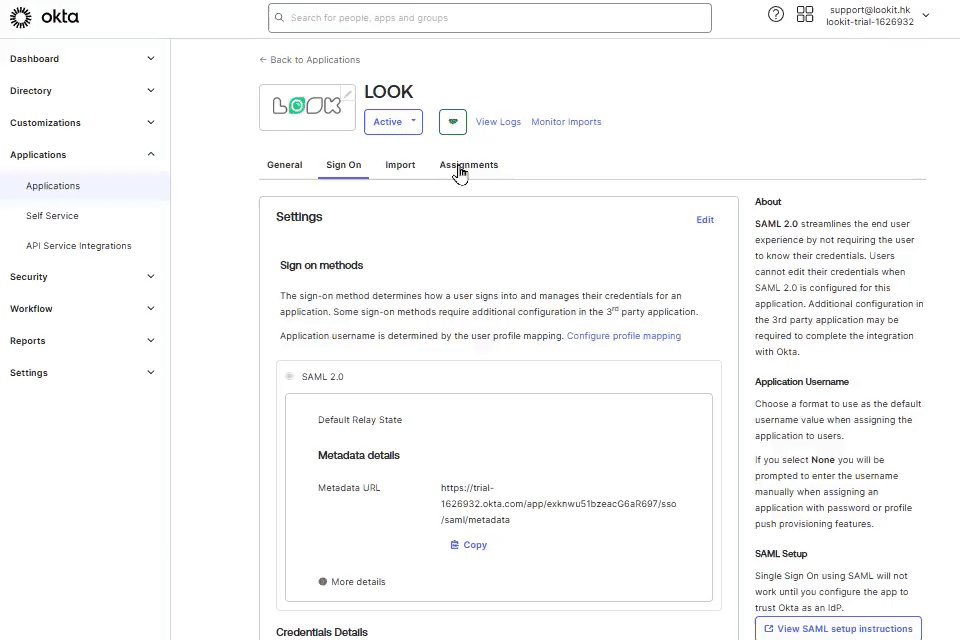
7. In OKTA in Assignments tab, click Assign button, and select Assign to People. Select an email from list of users and click Assign, Save and Go Back.
Note: user must have Look account.
Go back to Look account, click Sign out, and on sign-in page, click Sign in with SSO, enter the email address assigned to OKTA, and click Sign in with Single Sign On.


