Table of Content
In the context of digital signage, the Apple Mac Mini can be considered a “high-end” commercial-grade media player. Unlike the Amazon Firestick or Google’s Chromecast, the Mac Mini would be applicable in complex projects with large, high-definition screens, such as in a museum setting. If you own a Mac Mini and want to use it for your digital signage, then it’s an excellent solution, however, if you intend a simpler setup like a fast-food restaurant menu, there are other more affordable alternatives like the Look HD-2222 Lite that would work just fine.
In a previous article, we compared the older Intel Mac Mini vs Mac Mini M1, but today, our focus is on the M1 and M2 models. We’re going to discuss their performance capabilities and then show you how to set up the Mac Mini for digital signage alongside Look DS for remote management.

What is Apple’s Mac Mini?
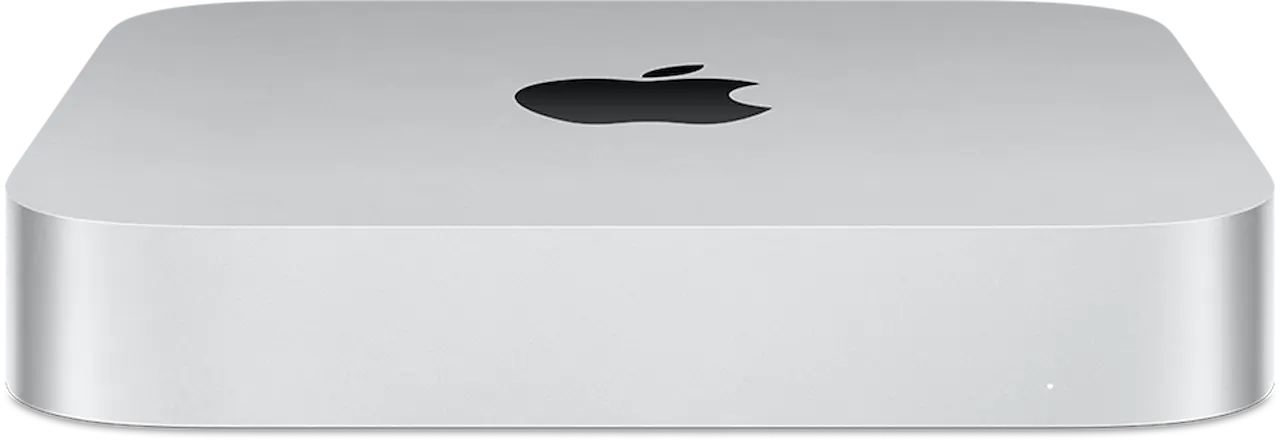
The Apple Mac Mini is a small form factor desktop computer developed and marketed by Apple Inc. It’s the company's only consumer desktop computer that is sold without a display, keyboard, or mouse.
During its launch, Steve Jobs emphasized the Mac Mini's affordability and compact design, stating that it was the "most affordable Mac ever". Considering the starting price of the M1 and M2 models, at $699 and $599 respectively, they are way cheaper than the iMac or Mac Studio. Even the discontinued Intel-based Mac Mini, starting at $799, was a more budget-friendly option compared to other Apple desktops.
Before the transition to Apple silicon, Mac Minis were powered by Intel processors. These processors, while capable, had limitations in terms of power efficiency and thermal management compared to the newer M1 and M2 chips. This meant that Intel-based Mac Minis could get quite hot and noisy under heavy workloads, which might not be ideal for some digital signage setups where quiet operation and efficient power consumption are important. However, Intel-based Mac Minis provided more RAM and storage configuration options.
With the transition, Apple gained greater control over its hardware and software integration. The M1 chip, launched in November 2020, and its subsequent iterations like the M2 (launched in June 2022) and M2 Pro (launched in January 2023), allowed Apple to optimize performance and power consumption for a much faster and more responsive Mac Mini experience. The Intel-based Mac Mini models were discontinued in January 2023 to pave the way for the M2 and M2 Pro models.
Mac Mini M1 and M2 Overview
Design and Build
The Mac Mini M1 and M2 look pretty much the same, keeping the classic small square design that Mac Minis is known for. They have a simple aluminum body at 7.7’’(19.7cm) by 7.7’’(19.7cm) and stands at 1.4’’(3.6cm). For a digital signage setup, these dimensions in addition to over a kilo (1.18kgs) in weight, might not be the most discreet option for wall mounting, which is the most typical signage setup. However, if you’re not opposed to an additional investment, you can use the VESA mount bracket specifically designed for the Mac Mini. The mount will securely attach the Mac Mini to the back of the wall-mounted TV, which is a practical and effective setup.
Performance
The Mac Mini M1 and M2 models are much faster than their Intel-based predecessors. The M1 chip, Apple's first custom silicon for Macs, has an 8-core CPU, an 8-core GPU, and a 16-core Neural Engine. The M2 chip builds upon this foundation, with an 8-core CPU with improved performance and efficiency cores, along with a more powerful 10-core GPU option and a 16-core Neural Engine. Both chips can handle everyday tasks like web browsing, email, and document editing with ease, while also being capable of running resource-intensive applications smoothly. The M1 and M2 chips are more power efficient with longer battery life and quieter operation.
Memory and storage options
Both the Mac Mini M1 and M2 models have a variety of memory and storage options to fit different needs and budgets. You can choose from either 8GB or 16GB of memory for the M1, while the M2 offers 8GB, 16GB, or 24 GB. This memory is what's called "unified memory," meaning it's shared by all the computer's components for faster performance. As for storage, both models come with fast SSD options ranging from 256GB to 2TB, so you can pick the amount that suits your work and storage needs.
Graphic Capabilities
The M1 and M2 can simultaneously support up to two displays. The M1 chip, with an 8-core GPU, can handle one external display with up to 6K resolution at 60Hz connected via Thunderbolt, and one display with up to 4K resolution at 60Hz connected via HDMI.
The M2 chip with a 10-core GPU can support one external display with up to 6K resolution at 60Hz over Thunderbolt and one display with up to 5K resolution at 60Hz over HDMI
Connectivity
Both models come with two Thunderbolt 4/USB 4 ports, which support high-speed data transfer, video output, and charging. They also have two USB-A ports for legacy peripherals and an HDMI port for connecting to displays.
Ethernet and Wi-Fi capabilities
The Mac Mini M1 and M2 come with built-in Wi-Fi 6 and Gigabit Ethernet for reliable and fast network connectivity for streaming content, updating software, and remotely managing the device. The Ethernet port is configurable to 10Gb Ethernet for even faster network speeds. Both models support Bluetooth 5.0 to easily pair with wireless peripherals like keyboards, mice, headphones, and trackpads.
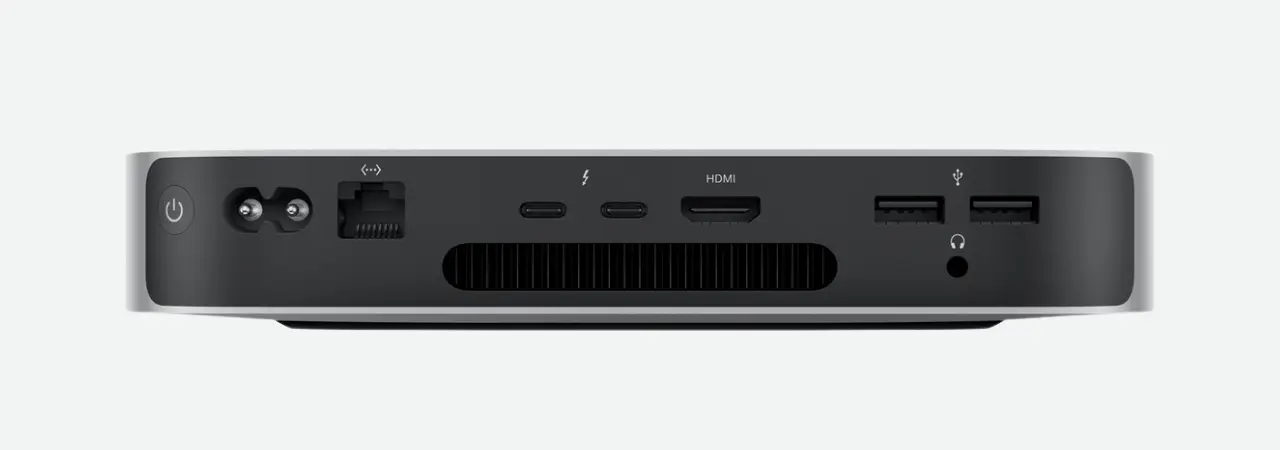
Setting Up Mac Mini for Digital Signage
Setting up your Mac Mini for digital signage is simple. You start by unboxing and connecting the power cable to a power source. Next, plug in your preferred input devices, such as a Bluetooth mouse and keyboard or USB peripherals. Remember, the Mac Mini doesn't come with these, so have them ready.
Connect your display to your Mac Mini using either the HDMI port for a 4K resolution or the Thunderbolt USB-C port for an impressive 6K resolution. In case your display has a different type of connection, you can easily find a compatible USB-C adapter to make it work.
Turn on your Mac Mini by pressing the power button and follow the Apple setup process. You will need a WI-FI connection for remote management or content updates.
Don't forget to adjust your display settings to your liking within System Preferences. From resolution and brightness to orientation and arrangement (if using multiple displays), so that your signage is uniform and clear.
Finally, a small but important detail: disable any sleep or screen saver settings to prevent interruptions in your digital signage playback.
Installing Look DS
Look DS is the perfect companion for your Mac Mini simply because it's incredibly user-friendly, just like your Mac. You'll find it easy to create and manage your content, and the scheduling tools ensure your content appears exactly when and where you want it.
Let’s get you started on how to configure the Look app on your macOS.
Download and Installation
- Navigate to the Look Digital Signage website and download the Look DS Player software for macOS.
- Open the downloaded file and follow the on-screen instructions to install the software on your Mac Mini.
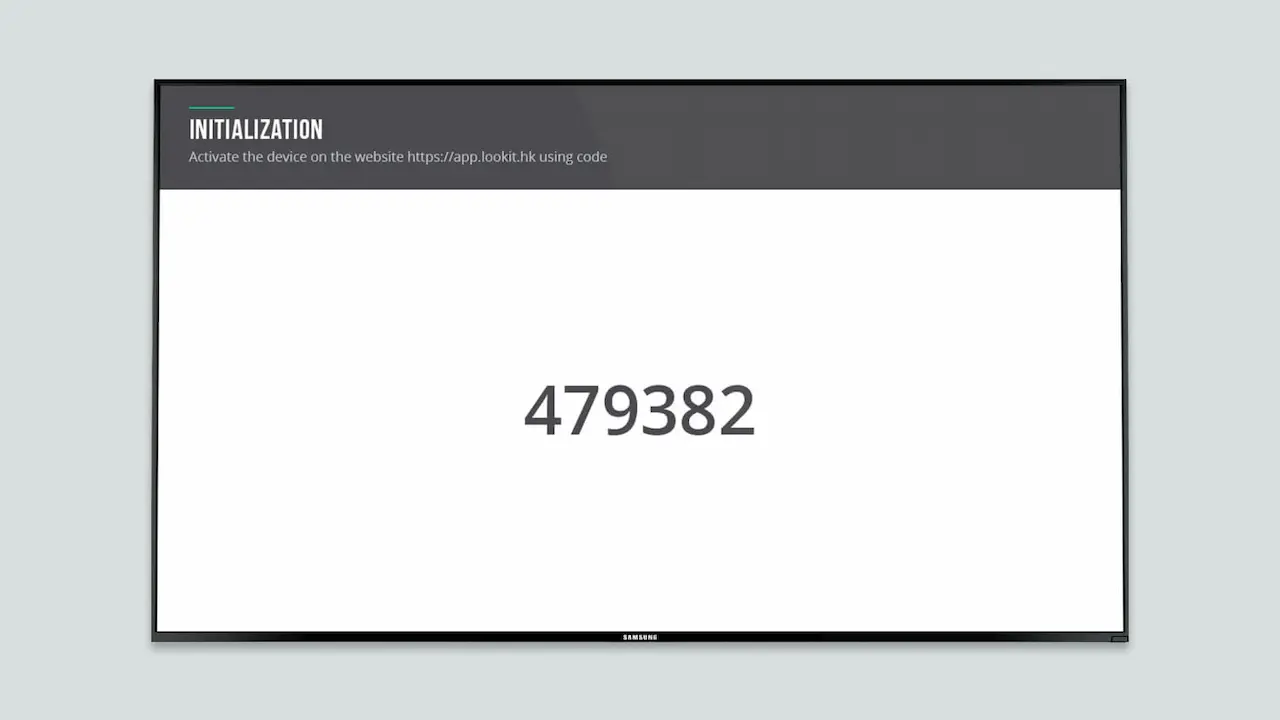
- Once installed, launch the Look DS Player. You will be presented with a pairing code.
Configuration
- Open a web browser and visit the Look Content Manager App. Sign up for a new account or log in if you already have one.
- In the Look Content Manager, click on "Add Screen" and enter the pairing code displayed on your Mac Mini screen.
- Give your screen a name and assign it to a group if you have multiple displays.
- In the screen settings adjust parameters like resolution, orientation, and brightness to match your display's capabilities and preferences.
- Choose the content you want to display on your screen. Look DS supports a variety of content types, including images, videos, web pages, and even live streams.
- Organize your content into playlists and schedule them to play at specific times or regularly.
.webp)
Apple Mac Mini FAQs for Digital Signage
Can I use any digital signage software with the Mac Mini?
Absolutely, but make sure the software is compatible with macOS. To get started, take advantage of the Look Digital Signage Software's free 14-day trial period and try all the features without limitation. Look DS works seamlessly with your MacOS and makes the whole experience feel natural and intuitive.
Do I need any additional hardware for digital signage with the Mac Mini?
You'll need a display (TV or monitor), an HDMI or Thunderbolt cable to connect it, and potentially a VESA mount if you plan to mount the Mac Mini behind the display.
Can I upgrade the memory or storage of my Mac Mini?
Unfortunately, the memory and storage in the Mac Mini M1 and M2 models are not user-upgradeable. They are permanently attached to the motherboard, so it's important to choose the right configuration for your needs at the time of purchase.
Can I run interactive digital signage on a Mac Mini?
Yes, the Mac Mini is capable of running interactive digital signage applications, especially with the M2 chip's enhanced performance. Your software will of course influence this capability. If you’re using Look DS, for instance, you can set up interactive scenarios using multiple layouts that users can switch between using on-screen buttons.
How do I keep my Mac Mini secure for digital signage use?
Use a strong password for your user account, disable automatic login, and consider using a lockable enclosure if the Mac Mini is placed in a public area.
What are some common troubleshooting tips for Mac Mini digital signage issues?
Check your network connection, ensure your software is up-to-date, restart the Mac Mini, and try a different HDMI or Thunderbolt cable. If problems persist, consult the software's documentation or contact their support team.


